
Today, let’s talk about the 5 snacks you should stop buying and start making at home. When you make things from scratch, you control the ingredients, as well as the amount of trash you bring into your home. It’s not hard to make these snacks, it just takes a bit of time. I usually set aside an entire day to make snacks for the week, but I have two hungry teenagers, and all three kids work out at TaeKwonDo 2 1/2 hours a day, 5 days a week. Snacks are the lifeblood in my house!
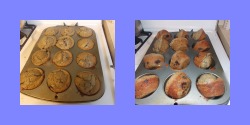
MUFFINS

*photo credit*
Easy enough for breakfast, or to make up for quick snacks, this basic muffin recipe will get you going with all sorts of creative ideas! Here’s the basic recipe for homemade muffins:
Begin by whisking together in a bowl:
2 cups flour (whole wheat, white, or a combination)
1 T. baking powder
1/2 tsp salt
Then, in another bowl, mix together:
2 large eggs
1 cup milk
2/3 cup sugar
1 stick melted butter, or 1/2 cup oil
Mix the wet into the dry, until moist. Bake at 400° for 17-20 minutes, until a toothpick comes out clean. Here’s some fun and creative add-in ideas:
Add 1/2 cup dried cherries, apricots, or cranberries.’
1 cup frozen fruit (blueberries, chopped strawberries or peaches)
Add 1 cup of your favorite flavor jam
Add 1/2 cup raisins and replace the milk with sour cream.
Add 1/2 cup shredded cheddar cheese, and omit the sugar.
Add 3 Tablespoons fresh chopped parsley, dill, oregano, or thyme.
TIP when you remove the muffins from the oven, turn them in the pan on their side. That will let the steam and heat escape from the bottom of the pan and your muffins won’t end up soggy
CRACKERS

These are really easy to make, once you get the hang of it. I usually have to make 5 batches in a row, because the first batch is “sampled” upon leaving the oven and the second batch is “just in case”. My kids love these!!
I use
1 1/4 cups whole wheat flour
4 tablespoons butter
1/4 cup water
1/2 cup cheddar cheese
1 tsp salt
1/2 tsp dried mustard powder
Simply cut the butter into the flour until it forms little “chunks”. Add remaining ingredients. This will get you a stickyish dough. You should be able to roll it out without it sticking to your hands. If it does, add more flour 1 Tablespoon at a time until you reach that consistency. Roll it out as thin as you can get it, in one sheet. I roll mine on parchment paper. Using a pizza cutter (which works best here), cut the dough into strips one way, then into squares the other. Dock with a fork, and add sprinkle extra salt on top. Bake in a preheated 400° for about 10 minutes. Keep an eye on them, because the edges may be done faster than the middle. Remove to cool. Store in air tight container for a week. I usually don’t have them around more than 3 days, though.
TORTILLA CHIPS
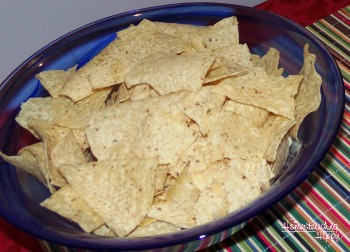
Easy peasy, these are…Simply take your leftover tortillas (get the recipe here) and cut into triangles. Heat oil of choice to 375°. You’ll want at least 1/2 inch oil in a skillet or cast iron pot. I prefer my cast iron pot due to the ability to hold heat well. I like to use palm shortening, beef tallow, and coconut oil for mine. Simple place the cut tortillas into the hot oil for 2-3 minutes and remove to a plate with either paper towels, or an old terry cloth towel to drain. Sprinkle with salt, garlic powder and onion powder.
OR, you could sprinkle with a cinnamon sugar mix for a sweet treat!
GRANOLA BARS
Another easy recipe for diy granola bars! You’ll never go back to buying them from the box again!
All you gotta do is take
3 cups your favorite granola recipe (get mine here)
1 cup honey
1 cup peanut butter
1 cup of add ins-chocolate chips, dried fruit, chopped nut, etc
Simply mix all the ingredients together and form in a 9×13 pan. Use a very sharp knife, and cut into bars. You can wrap yours in plastic individually, or we just take them out of the pan as we eat them.
FRUIT ROLL UPS

I like to make these out of applesauce when I am canning in the fall, but you can use any sauced fruit. Simply blend the fruit until it’s an “applesaucey” texture. If you have a dehydrator, dehydrate it for about 15-24 hours. Or, you can place in a 200° oven for 12-24 hours. We wrap ours up in parchment paper, and vacuum seal it for large quantities. Or you can just store in an airtight jar. I have found that they don’t really stick together too bad, even when you don’t put anything between them. Of course, you “could” sprinkle a bit of powdered sugar on them to help keep from sticking, if you want.
Need some help getting back into the kitchen and cooking from scratch? Try this delicious collection of easy to make recipes to get you started!

Original article and pictures take thehomesteadinghippy.com site
Комментариев нет:
Отправить комментарий